To follow up episode #22 When a Bridge Removal Goes Bad, I decided to also write an article on bad neck removals as well.
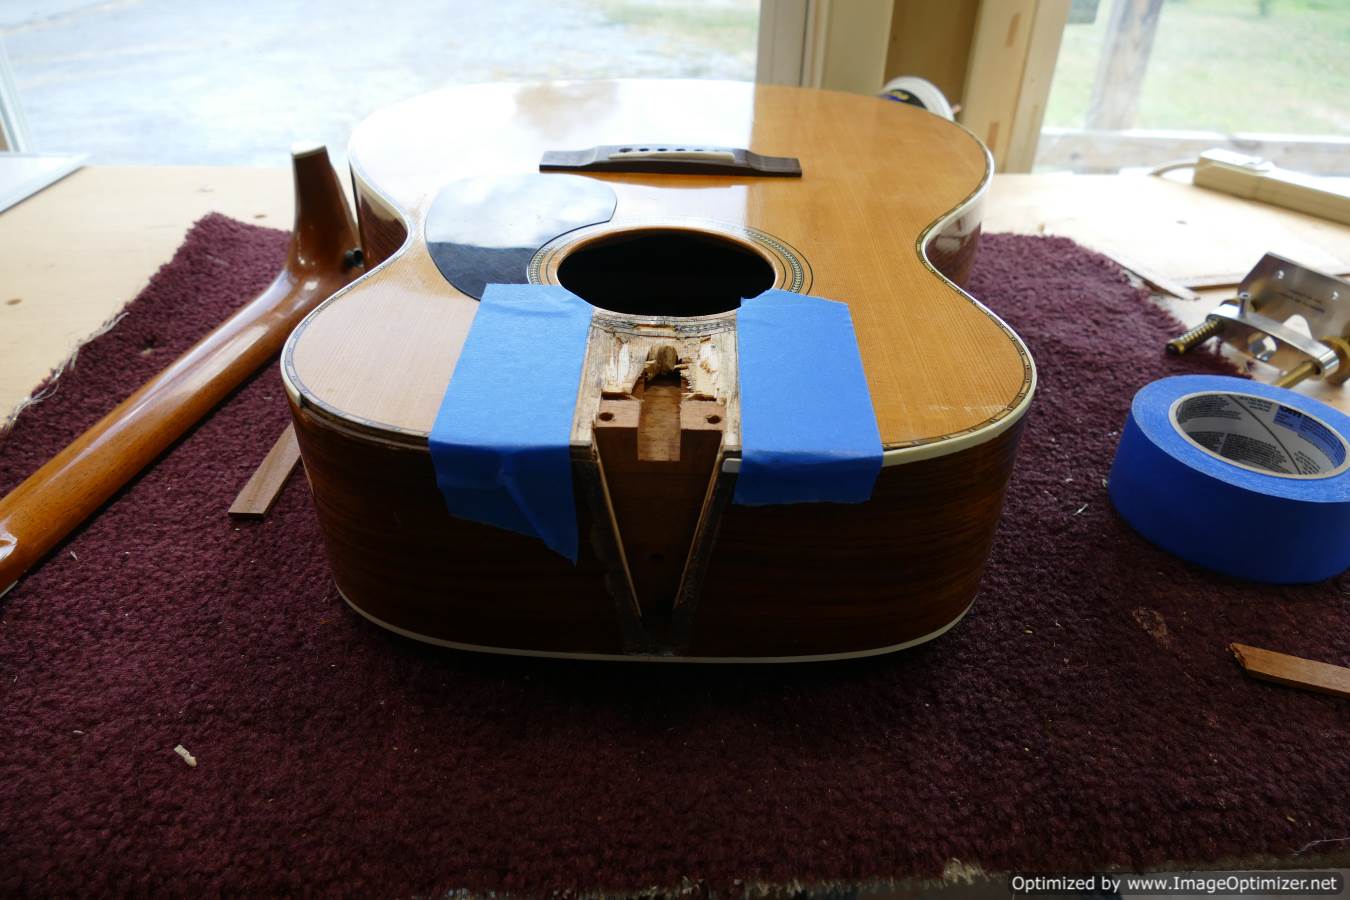
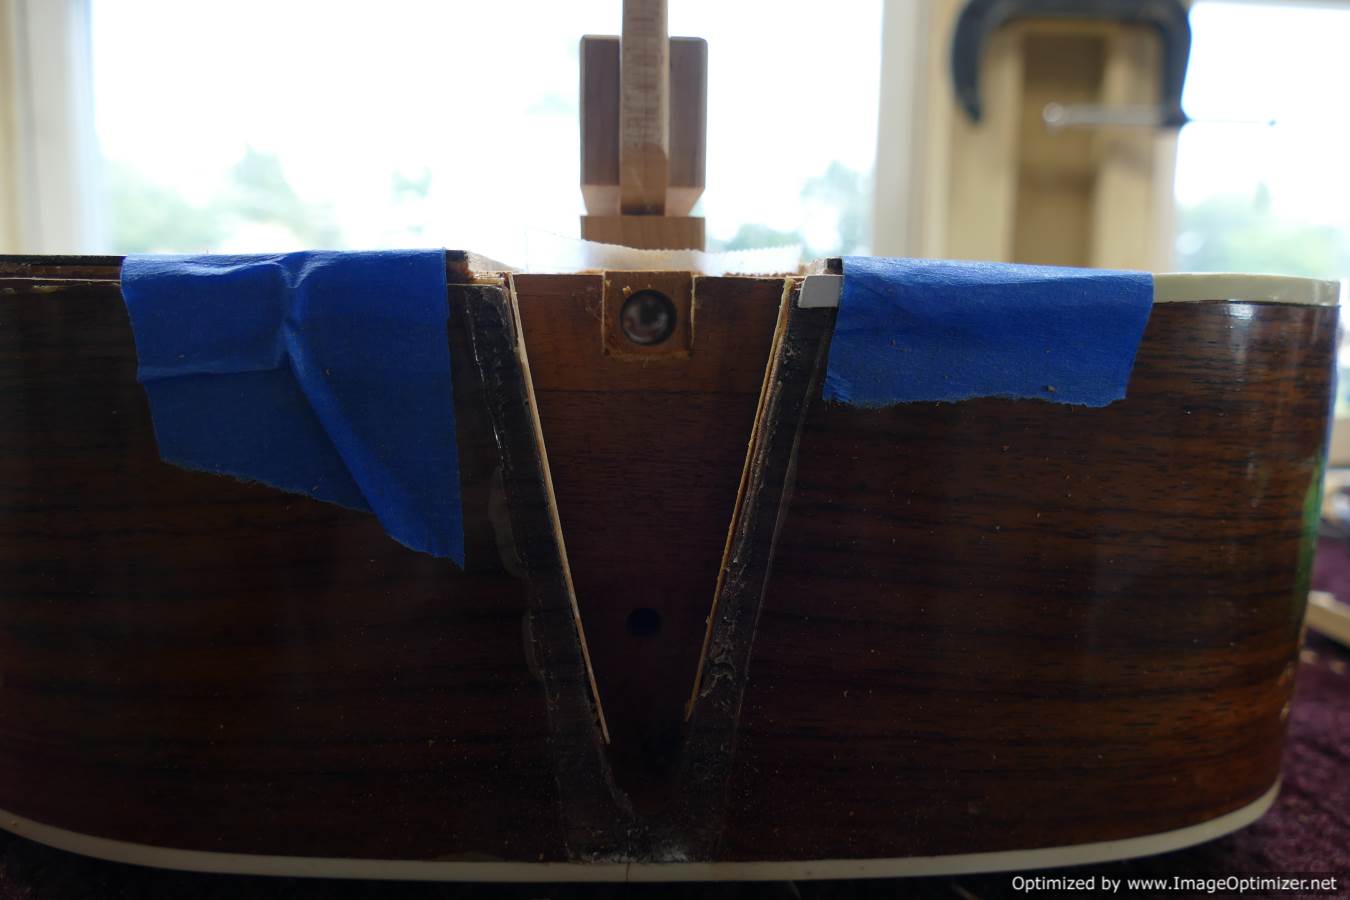
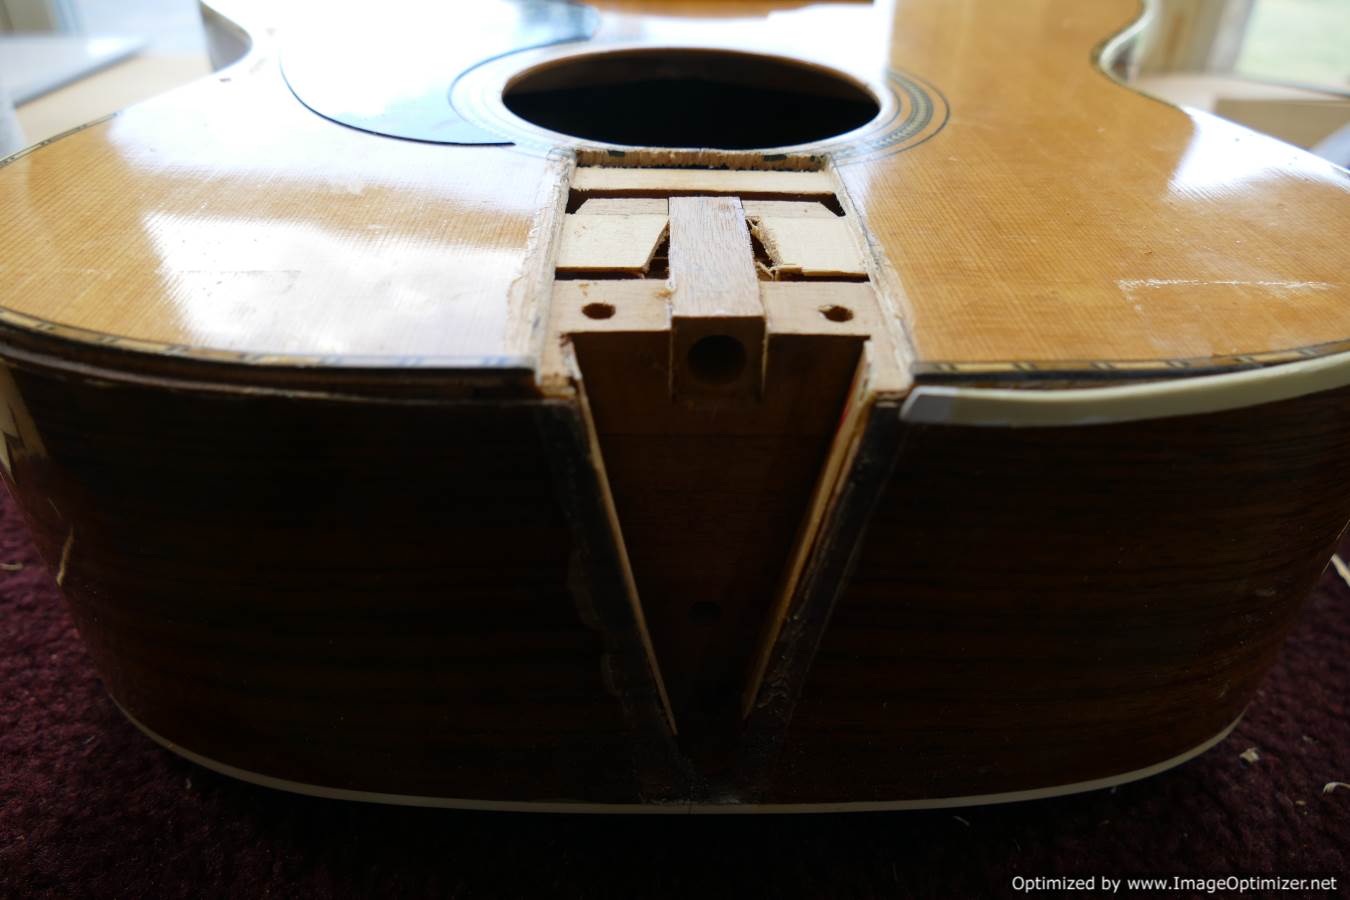
This neck removal was particularly hairy. I won’t get into why this was the case, but you can see the damage to the soundboard beneath the fretboard tongue was extensive!
Not to worry, though. Even this can be remedied!
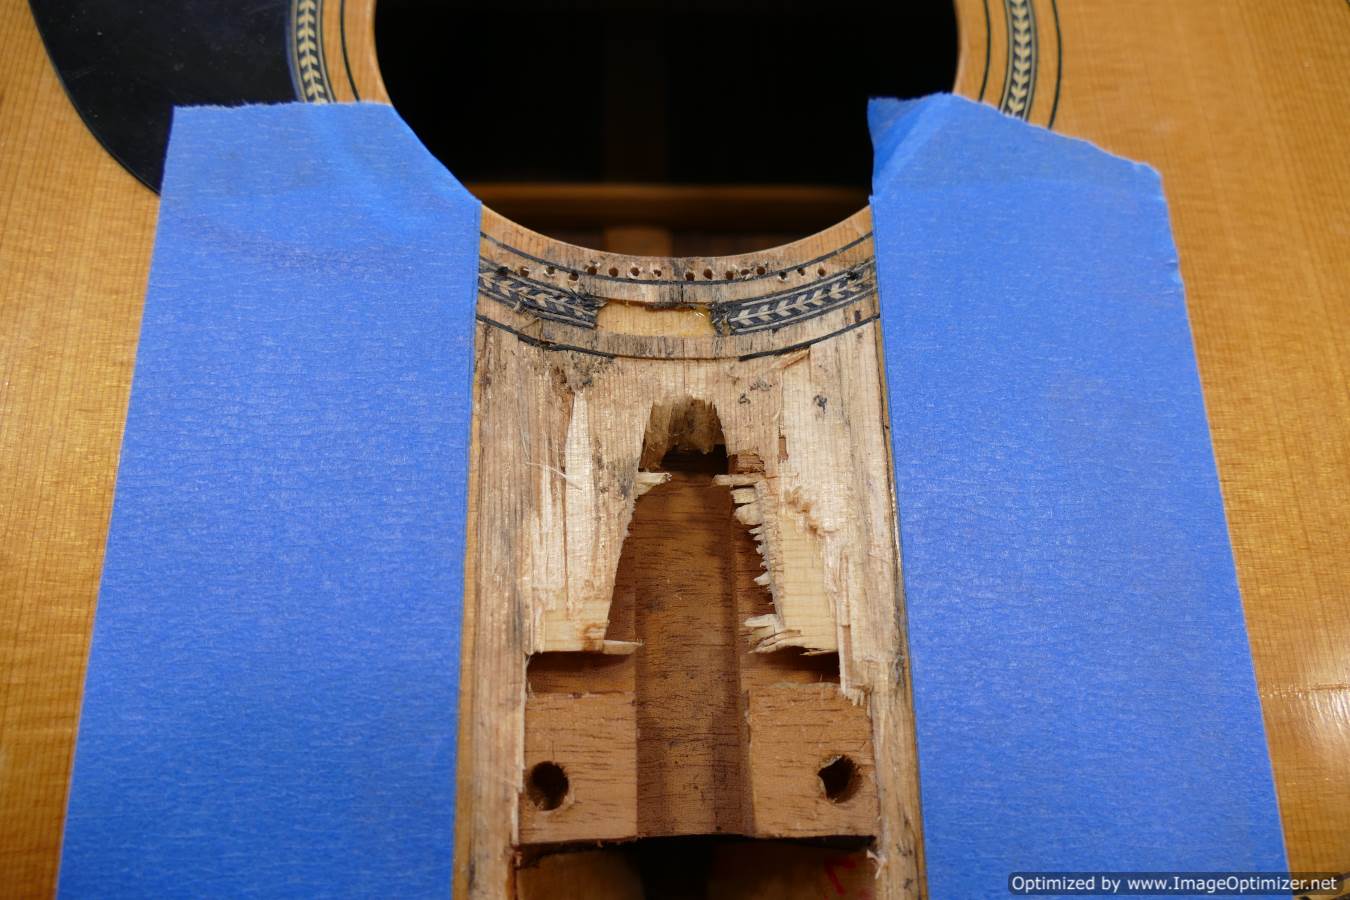
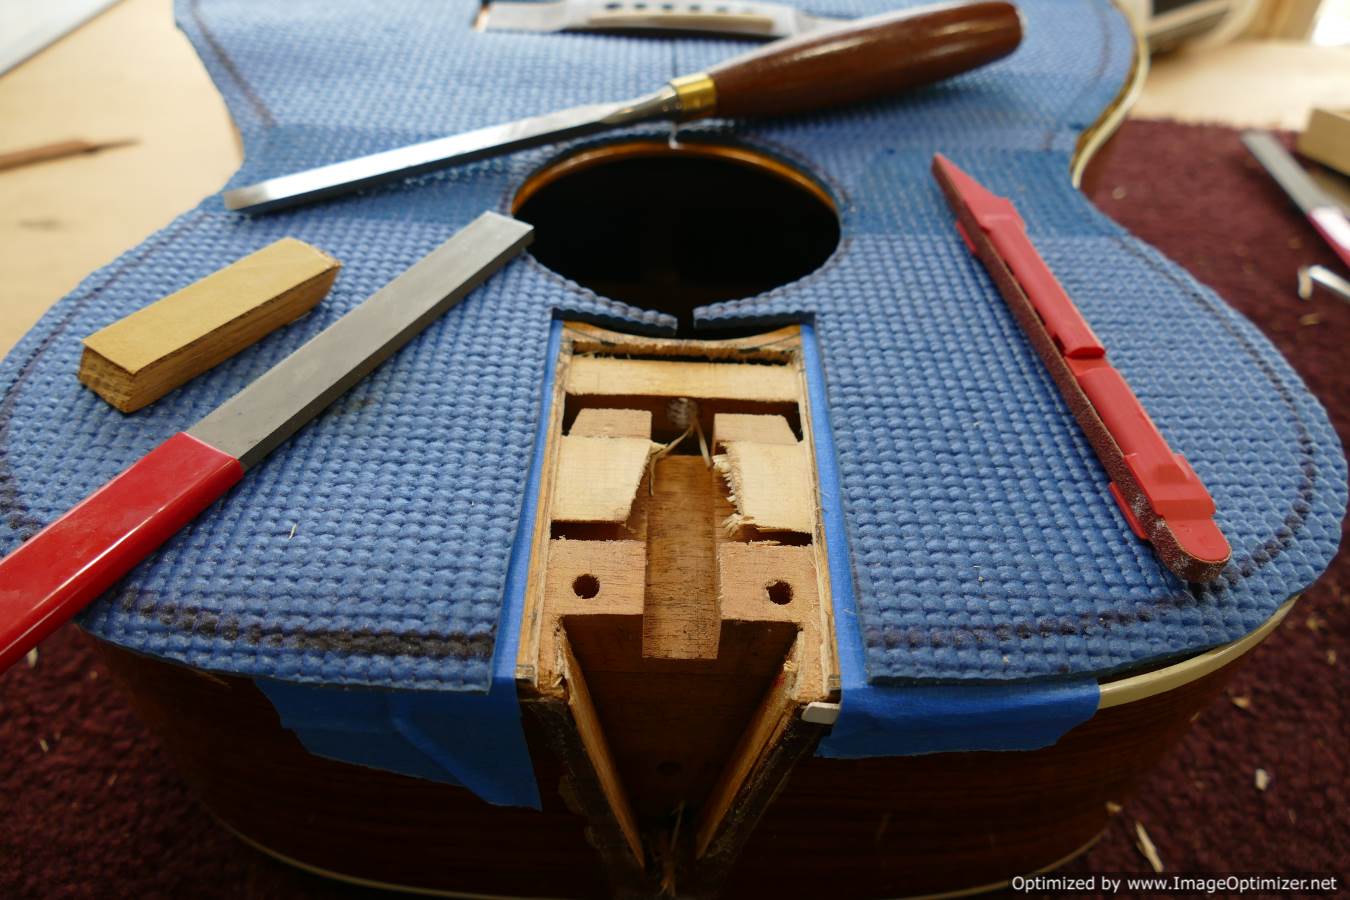
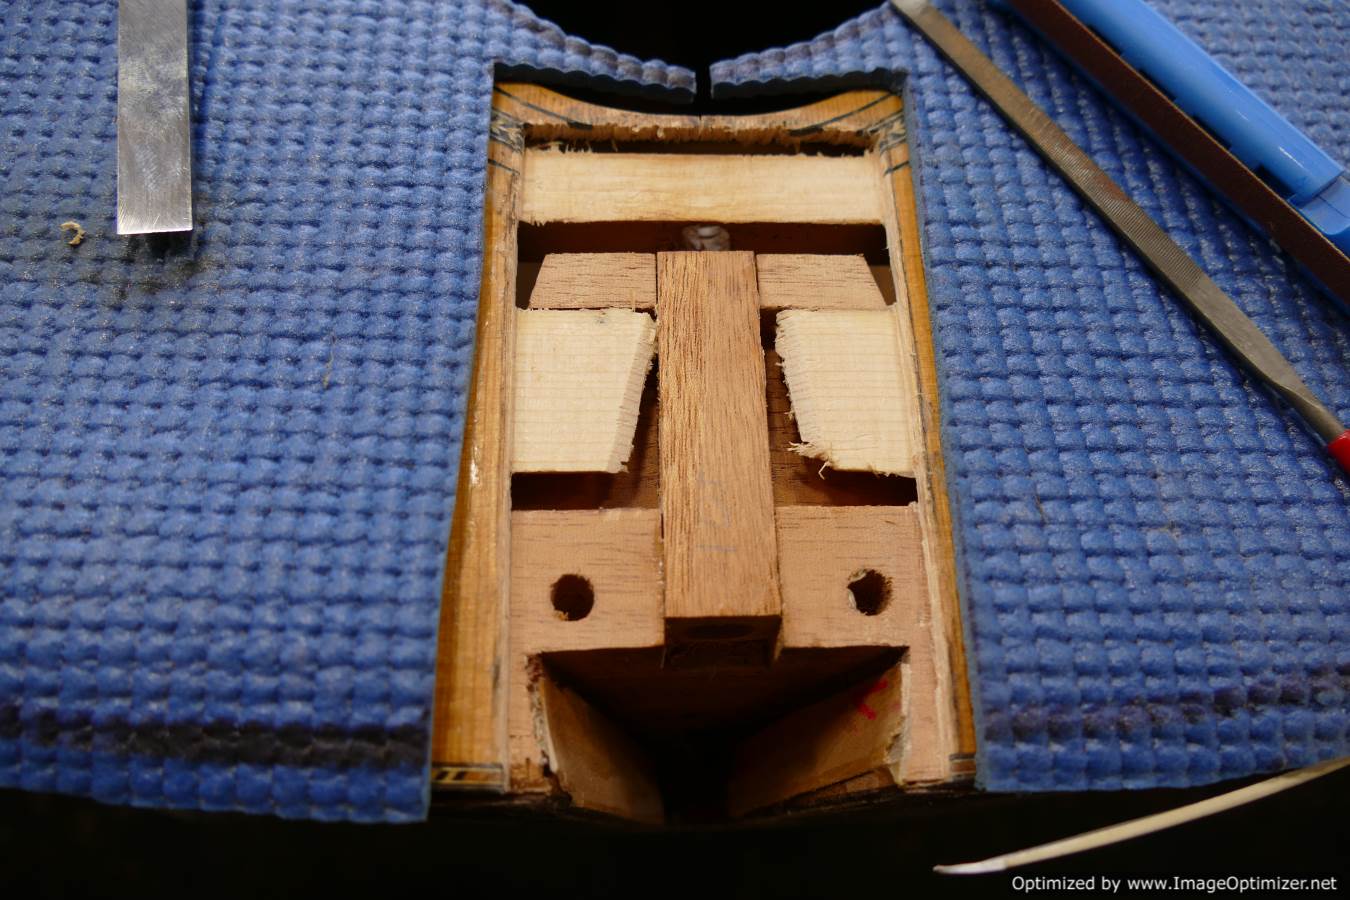
This picture was taken after I had already removed the worst of the damaged wood from the front of the neckblock with a sharp chisel. You can also see that I had to remove a part of the fretboard graft, which is a flat graft that runs crossgrain beneath the fretboard tongue. This is the V-shaped cut.
In order to be able to re-glue the fretboard tongue to this area I need to patch in a pad of fresh spruce over the entire affected area. Also, since the fretboard graft was significantly damaged I need to consider the structural integrity of the area as well.
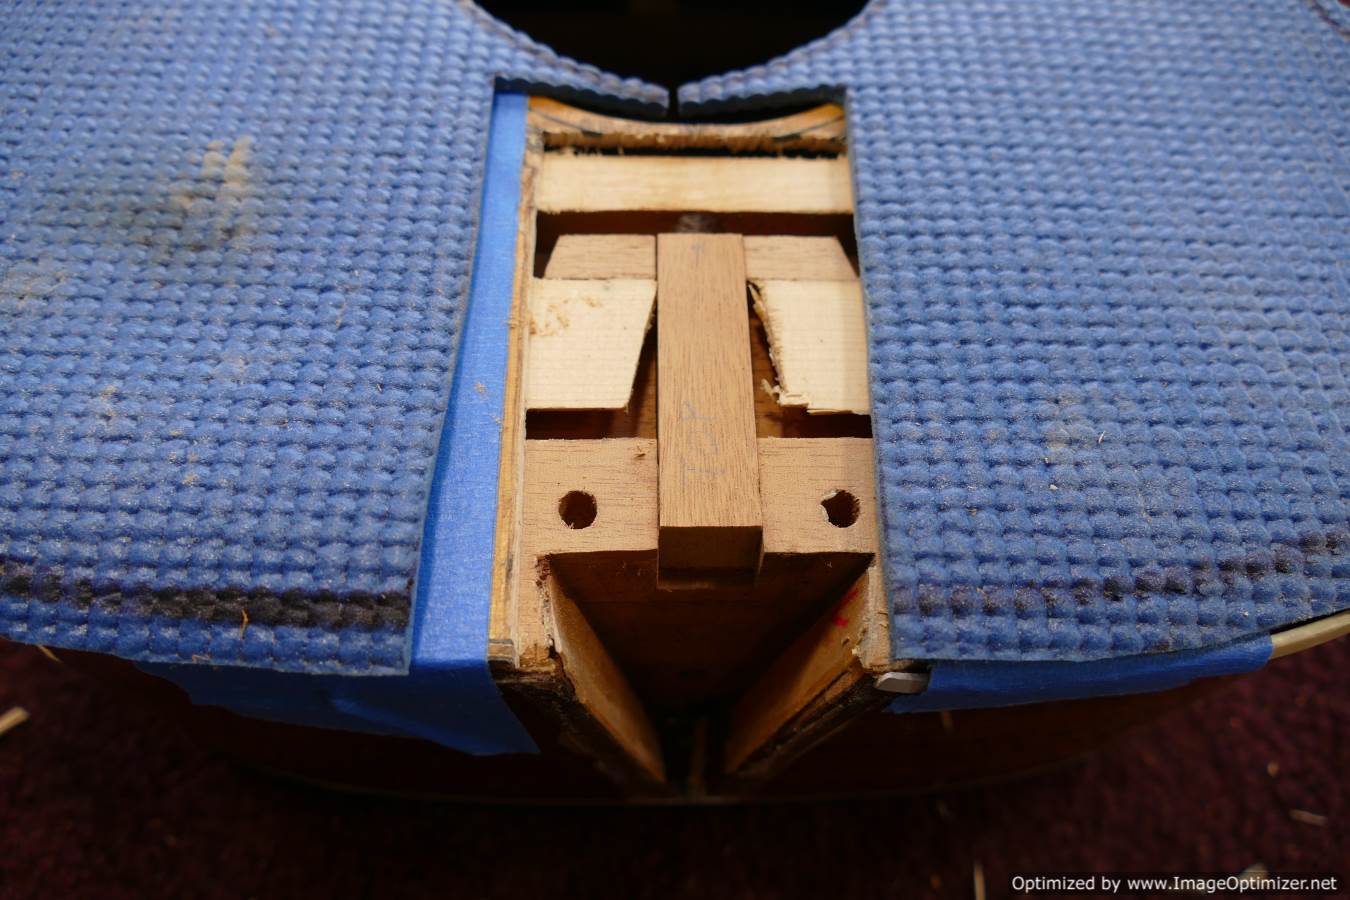
My first objective is to clear everything down to the glue surface of the neckblock, the fretboard graft, and the transverse bar. I am not going to use a dremel tool here as I did in #22 When a Bridge Removal Goes Bad. This is because it is difficult to support the dremel tool as I did in that situation. The location of the soundhole is a problem.
Instead I will carefully clear the material with a variety of sharp chisels and abrasive tools.
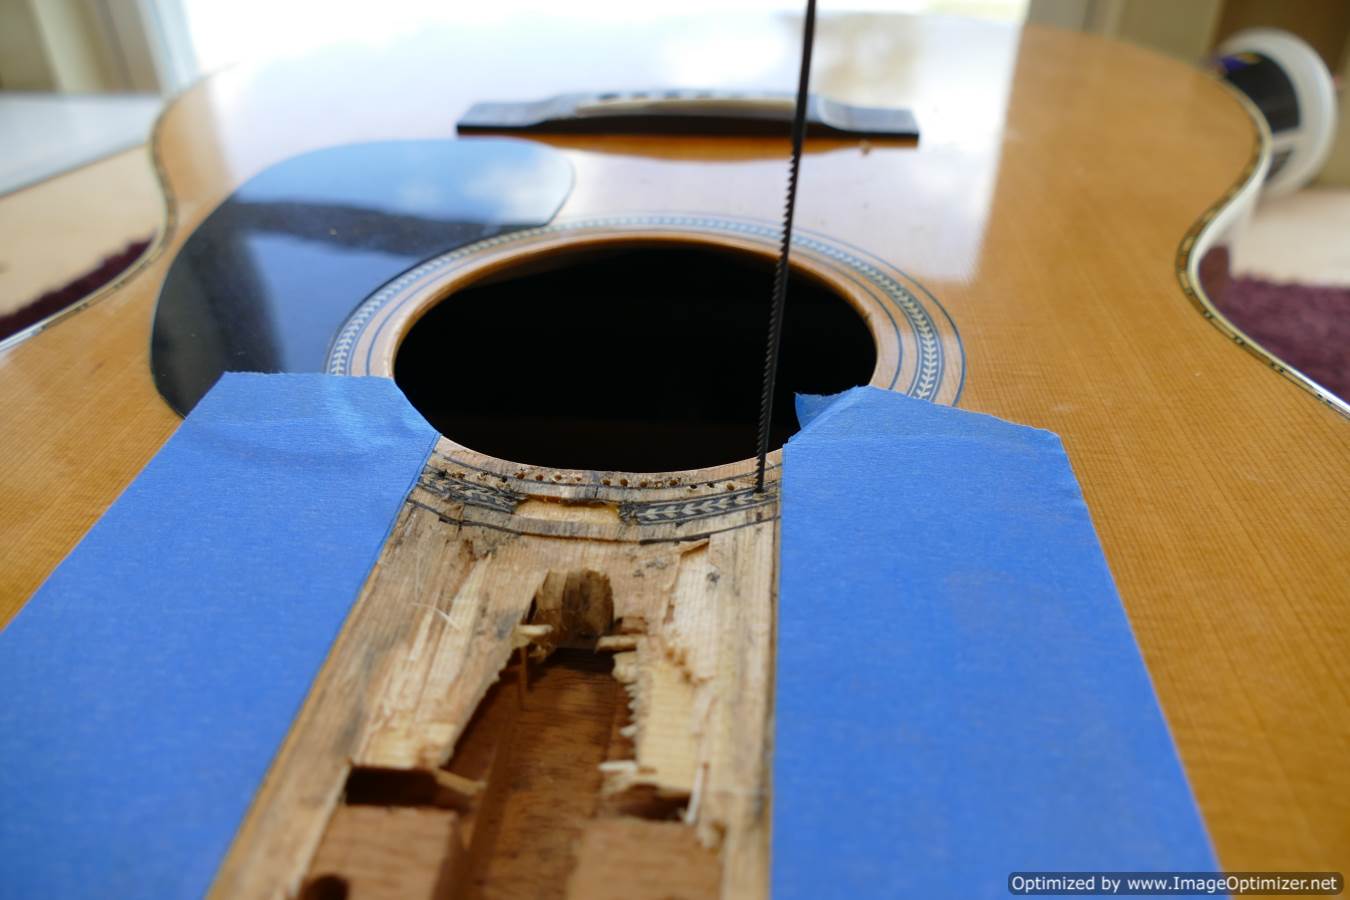
But first, as a protective measure, I need to make a cross-grain cut at the edge of the affected area, just before the soundhole edge. That way, as I remove material, the spruce cannot tear out along the grain lines and affect the area outside of where I am working.
I do this by drilling several holes with a tiny bit, and using either a large jeweler’s saw blade or a small coping saw blade removed from the saw’s frame to cut along those holes. You will notice that the cut is made just outside the transverse bar.
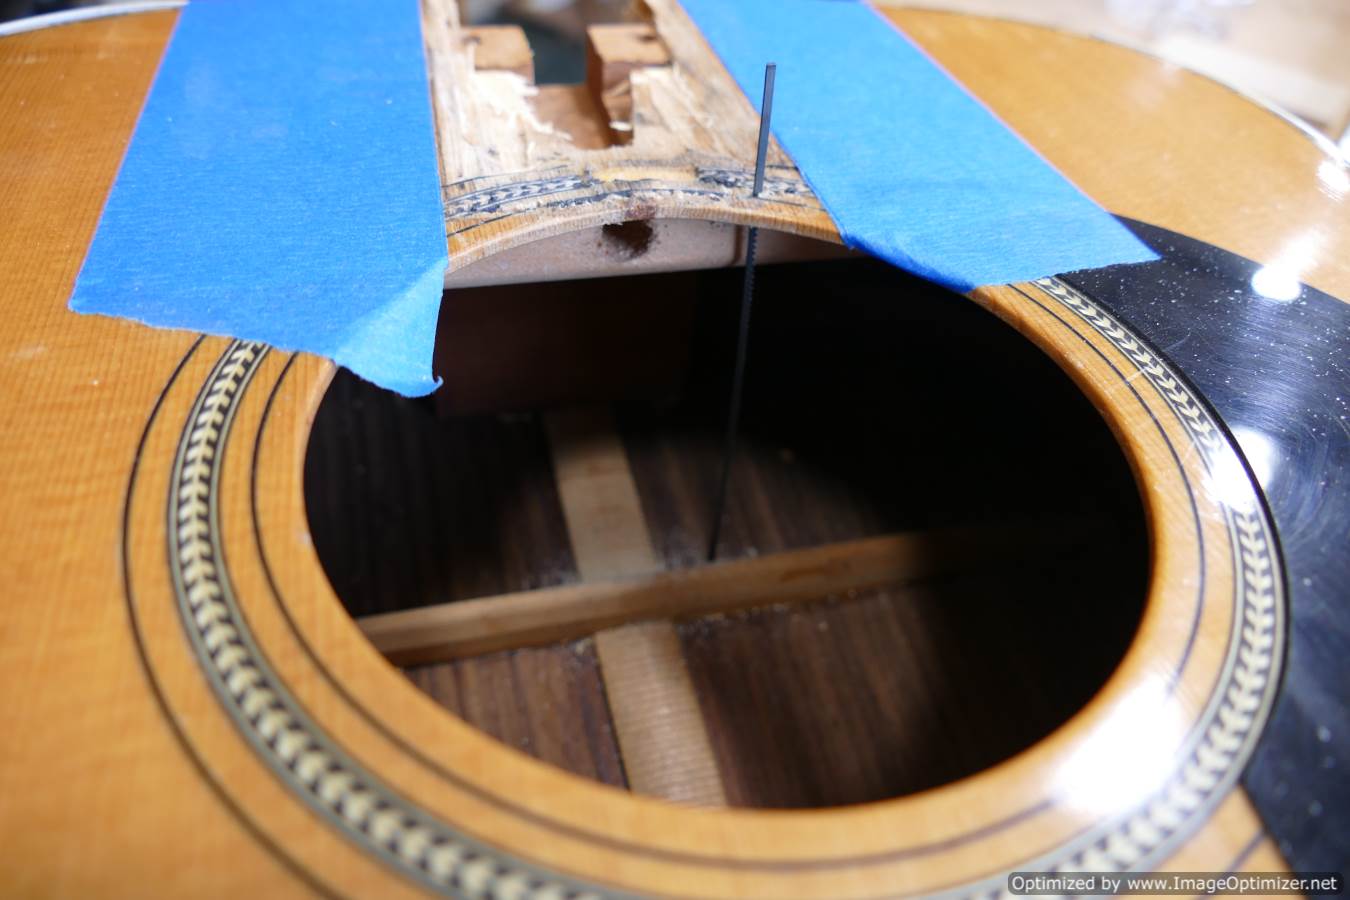
To clear the material I used a variety of sharp chisels, being very careful near the edges or, in some cases avoiding the edges altogether.
I used the sanding stick on the right of the picture for stubborn areas and to get into corners. The file on the left was used to square up and straighten the edges. And finally, small sanding blocks stuck with 80 grit, 120 grit and 220 grit paper were used to clean up residual glue and truly flatten the area in preparation for the patch. I like my glue surfaces to be impeccably clean, flat and smoothed to 220 grit.
Now I can take on the structural concerns.
It would be difficult to just patch in a repair to the fretboard graft as it is. Also, in cases of extreme damage such as this, I would rather err on the side of over-bracing the area.
That is why I decided to first alter the neckblock to increase it’s contact area.
It is a mahogany bock, so in staying true to instrument’s construction, I found a mahogany scrap and I squared and shaped it to fit snugly in the truss rod access cavity. The scrap is glued in place a little bit proud of the surrounding surface so that it can be levelled later.

While it was clamped up, I drilled an oversized hole through the scrapblock, lengthwise, to open up access to the truss rod again. Doing this while it is clamped up prevents the scrap block from splitting apart.
Now I can more easily tackle the issue of the fretboard graft.
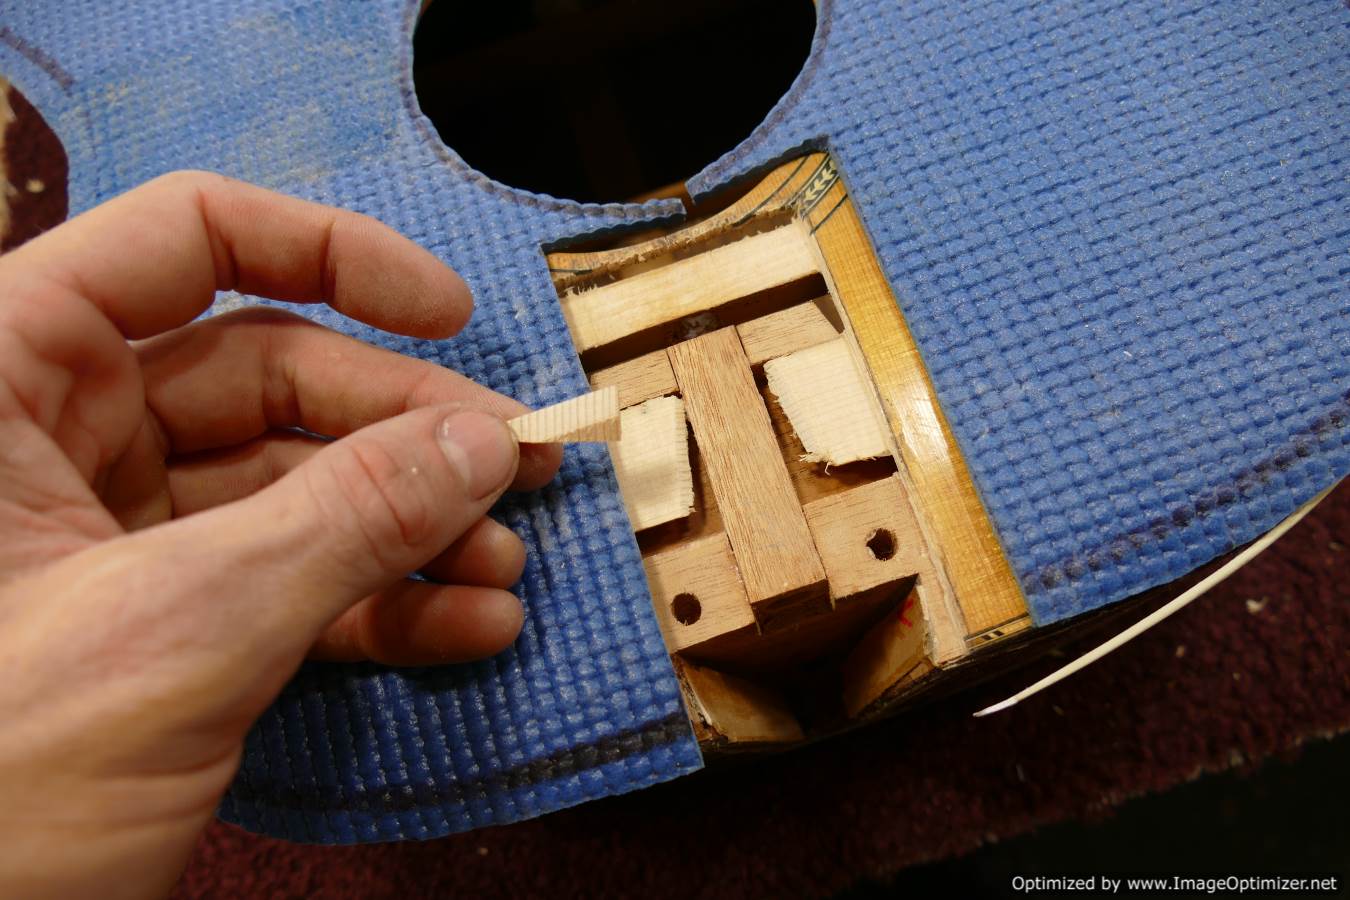
I put a significant bevel into the tattered ends of the fretboard graft (see the first picture). That way, I can put a corresponding bevel into the small spruce patches that I prepare (see the second picture). This creates a gluing surface for the repair and it allows me to easily clamp the patches so that they are nestled between the mahogany scrap and the fretboard graft (see the third picture).

After the glue dried, I levelled and smoothed the mahogany and spruce fills.
You may notice that a part of the soundhole is missing! Well, I got a little too aggressive when I was levelling with the thumb plane and a piece chipped out. Fortunately, I recovered the piece and it can simply be glued back in place later.

Finally, a spruce patch is fitted and cut to shape. Notice the hole in the middle of the patch. Because glue squeeze-out can be real problem if it gets near the finished surfaces, I drill a hole so that some of the excess glue can squeeze out into the hole rather than be forced out along the sides.

Was this useful? I would love to hear your questions or comments! I try to answer every e-mail I receive, so please be patient with me ![]() eric@ericschaeferguitars.com
eric@ericschaeferguitars.com
Want more of this? Subscribe below for Weekly Guitar Making Tips on “The Small Shop Luthier Blog”
Want to really learn more!? Take a class with Eric Schaefer and build your own guitar in 8 days!
Or Join The Online Guitar Building School