My Canadian friend brought me a Norman guitar with a lifting bridge, a belly bulge, and long run-out splits in the soundboard beginning just forward of the belly bulge. These are all symptoms of the same problem: too much tension at the bridge.

A lifting bridge
First, the bulge in the belly needed to be reduced, then the bridge removed and reglued. Finally cleats were installed on the inside of the guitar to patch up the splits in the spruce. I also glued a thin graft to the underside of the area that was worn thin by years of heavy picking.

The cleats are placed on the outside of the guitar to demonstrate to the camera where they will be located. Of course, they will be glued to the INSIDE of the guitar. Bottom Right: A set of magnets is used to glue the cleats.
I will save the details for belly reduction, removal of bridges, regluing of bridges and installation of cleats for another time. For Episode #22 I want to focus specifically on what to do between bridge removal and bridge reglue… when a bridge removal goes bad!
Not every bridge comes off clean. Even when you do everything right, some amount of tearout in the soundboard is expected. If the damage is minimal, which is usually the case, the bridge can be re-glued without any patching of the soundboard. If the tearout is significant enough to negatively affect the glue joint, then patching of the area is necessary. The patch may be the size of a dime or much larger.
In this worst case scenario the footprint under the bridge was affected throughout. I unfortunately never took a “before” picture of the damage, but take my word for it, it was bad!
Why did this happen? In this case, the lifting bridge had progressed so far, and in such a way, that the spruce had already begun tearing out before bridge removal even began.
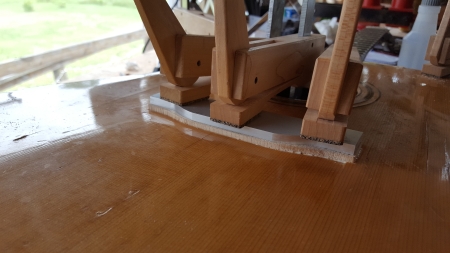
My solution was to rout out the entire footprint of the bridge to a depth that eliminates 95% of the damage, and install a spruce patch.
I say “95% of the damage” because certain areas of tearout were so deep that it was neither sensible nor necessary to rout the whole footprint to such a depth.

Notice the small areas of tearout that remain after routing. This is acceptable.
I routed the pocket with a 3/32″ bit in a dremel tool and a Stewmac saddle routing jig. Any “sled” type device that fits a dremel tool will work for this. The saddle routing jig works particularly well because of the Baseplate Travel Stops and the Jig Reference Plate (see image below).
The Baseplate Travel Stops prevent me from accidentally routing beyond the area of the footprint. The Jig Reference Plate allows me to work my way from the front of the bridge to the rear in multiple, parallel passes by adjusting the Jig Guide Plate to the Jig Reference Plate and then resetting the Jig Reference Plate with feeler gauge tabs after every pass. I’ve borrowed the image below from Stewmac’s website. This should hopefully help illustrate what I am talking about, even though the picture shows the jig routing a saddle slot, which is it’s actual, intended purpose.

For the majority of the rout I do not have to adjust the Baseplate Travel Stops. It is only for the rounded section of the footprint in the back that I need to adjust the travel stops inward after each pass. The 2 curved sections of the footprint (indicated by the arrows) then have to be touched up carefully with a chisel and/or a razor

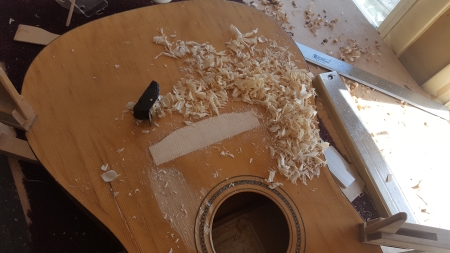
An oversized spruce patch is cut to shape and glued in place.
I level the patch with a thumb plane and fine-tune it with sandpaper on a flat block.
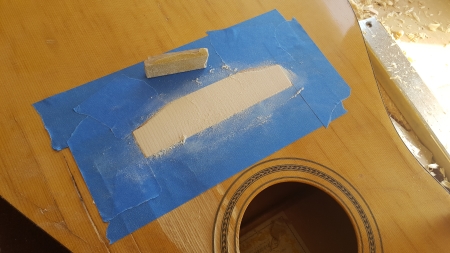
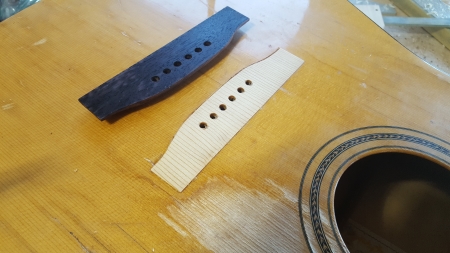
Once the patch is flat and level with the surrounding lacquer, I turn my attention to cleaning up the mating surface of the bridge.
Ordinarily for a bridge glue, I would sand the mating surface to the radius of the guitar top. The patch, however, has no radius, so the mating surface of the bridge is sanded flat on a granite block.

I relocated the bridge and clamped it in place so that I could mark the pin holes on the new patch and drill.
The guitar is now ready for a standard bridge glue-up.
After the Glue-up: Since the spruce patch sits level with the surrounding lacquer, rather than level with the wood of the soundboard, I made sure to seal around the bridge with brush on lacquer. You can also use superglue. Either way, it should be carefully applied.
Was this useful? I would love to hear your questions or comments! I try to answer every e-mail I receive, so please be patient with me ![]() eric@ericschaeferguitars.com
eric@ericschaeferguitars.com
Want more of this? Subscribe below for Weekly Guitar Making Tips on “The Small Shop Luthier Blog”
Want to learn more? Take a class with Eric Schaefer and build your own guitar in 8 days