*Note: The jig used in this tutorial can be constructed using the plans provided at this link: Radial Rosettes: Building the Radial Rosette Maker.
Or it can be purchased here: https://www.ericschaeferguitars.com/the-radial-rosette-maker-kit/
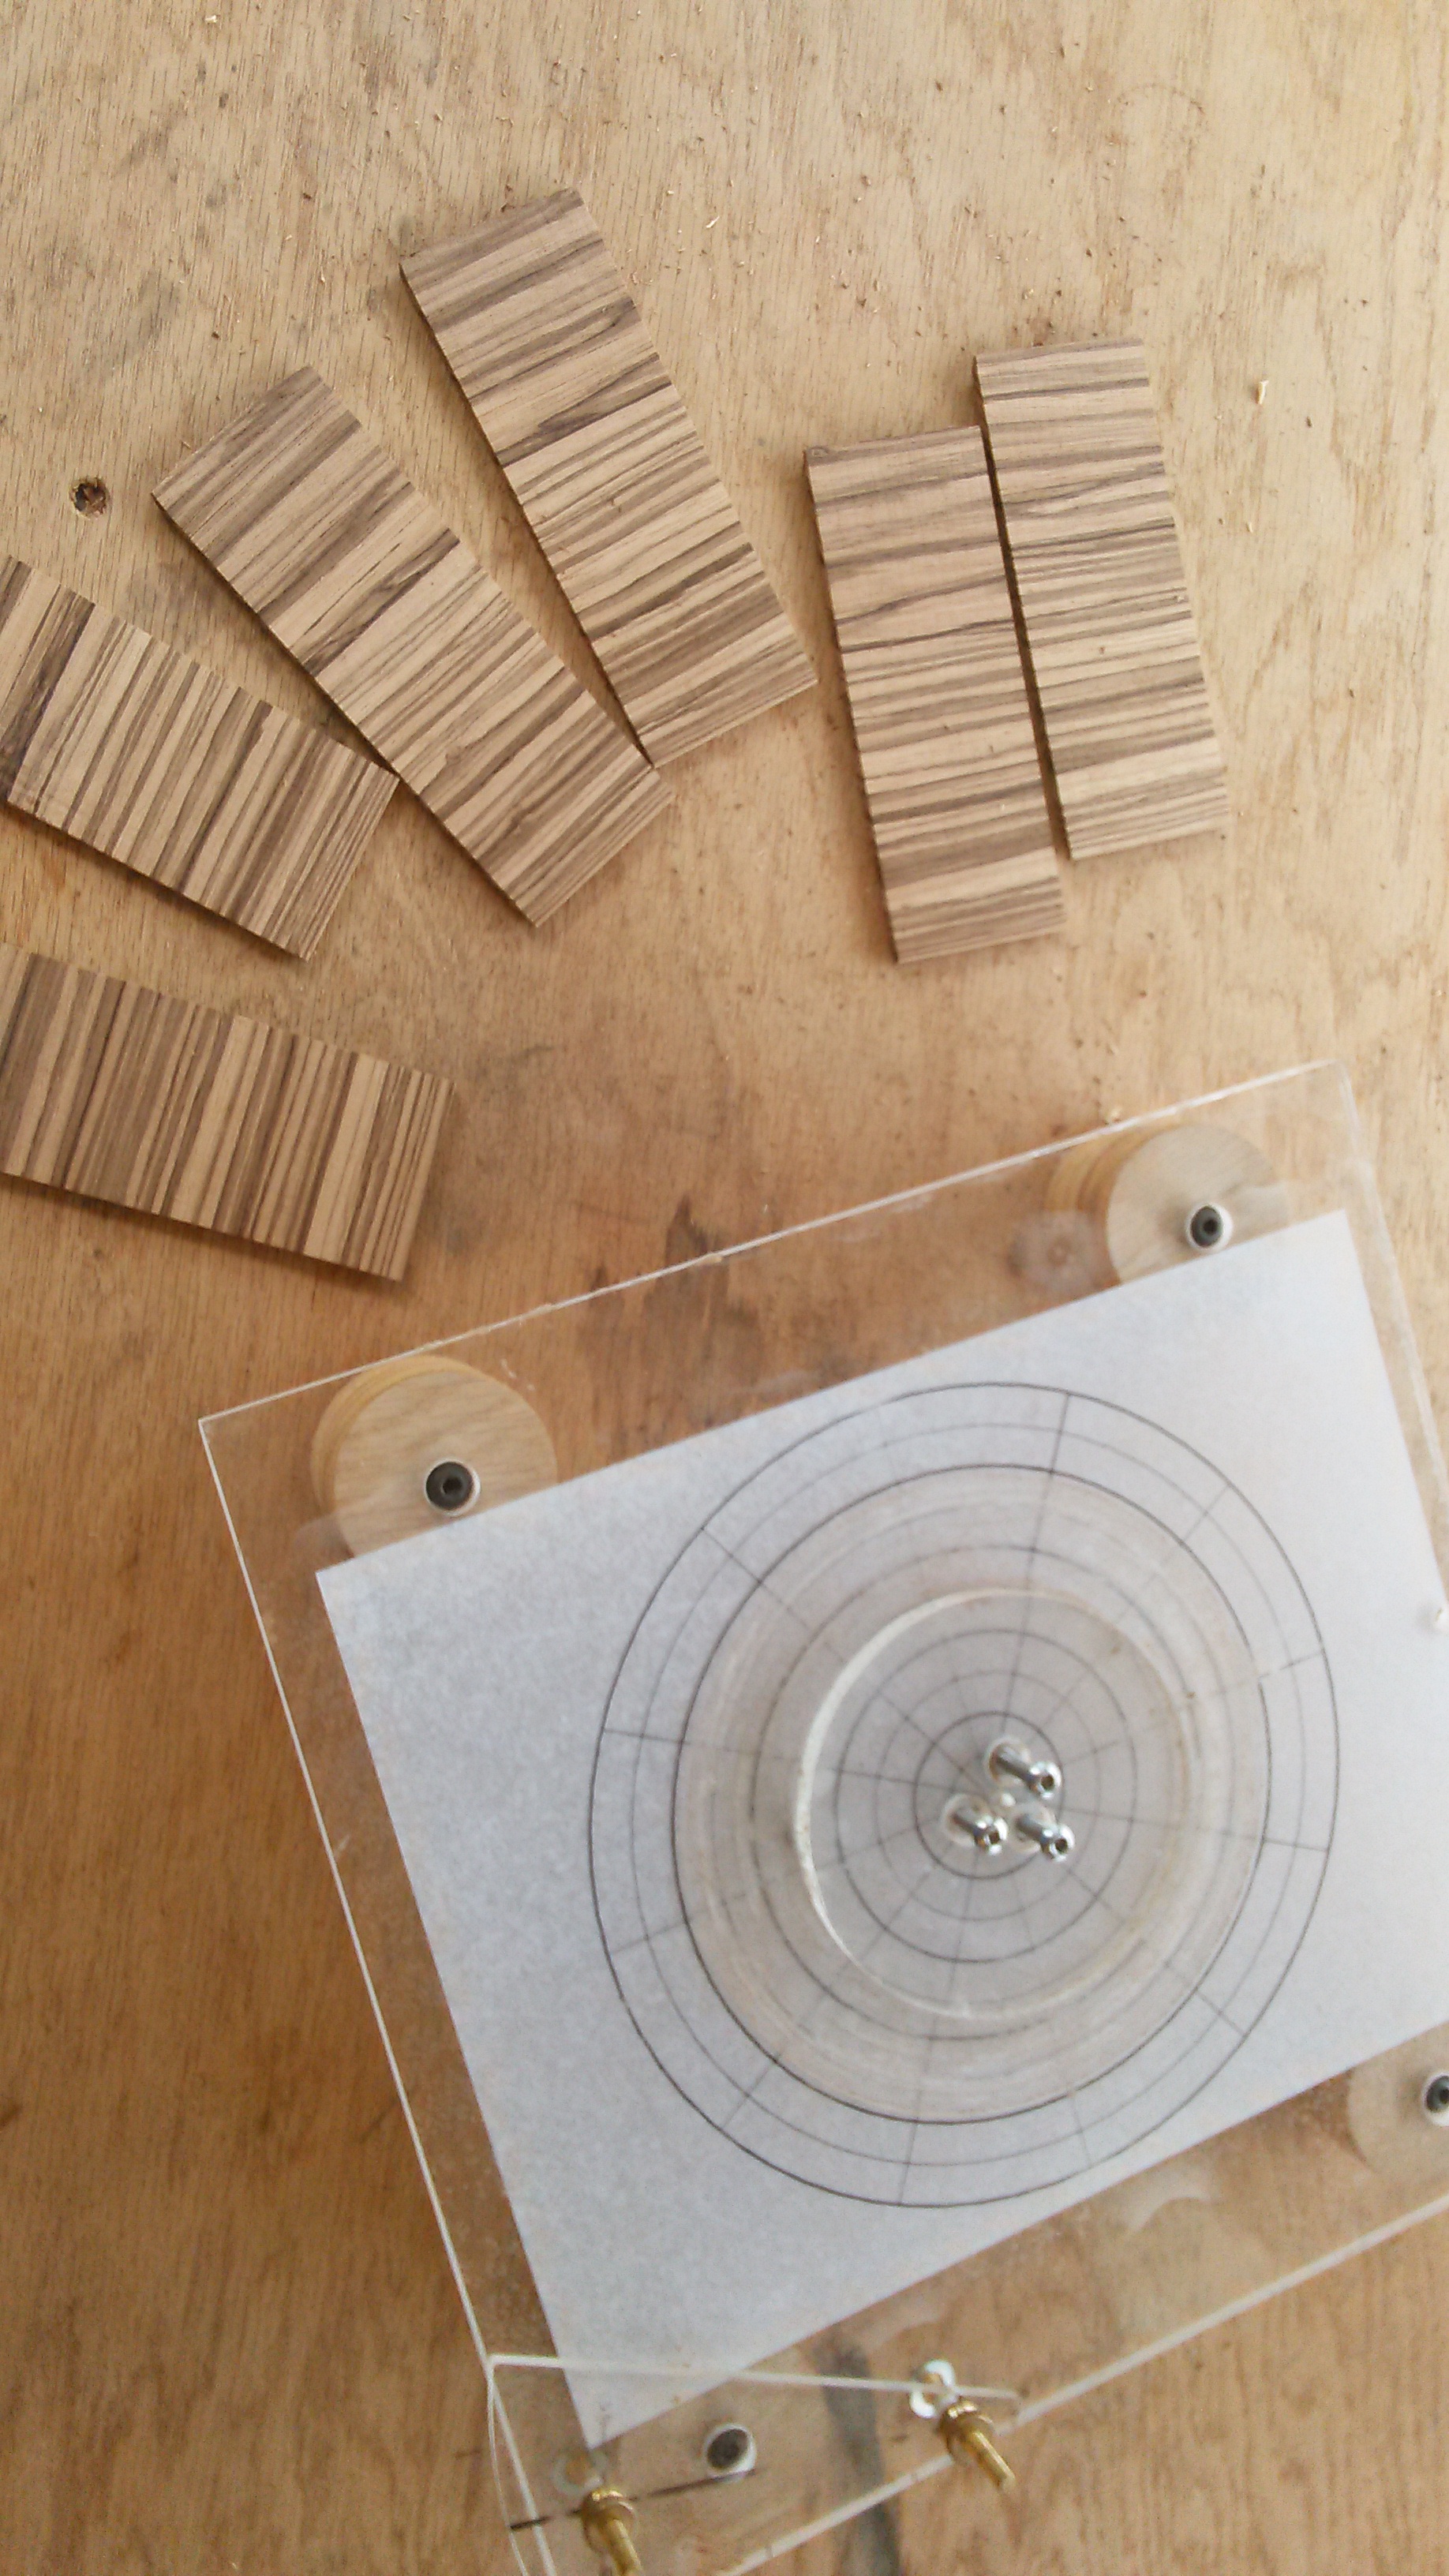
- I cut my scrap material (In this case, Zebrawood) into 2″ strips. I prefer the material to be approximately 1/8″ in thickness, give or take 1/32″. This is an excellent opportunity to make use of offcuts from your back and side sets.
![IMG_20150811_152409[1]](http://www.ericschaeferguitars.com/wp-content/uploads/2015/09/IMG_20150811_1524091-e1441334424586.jpg)
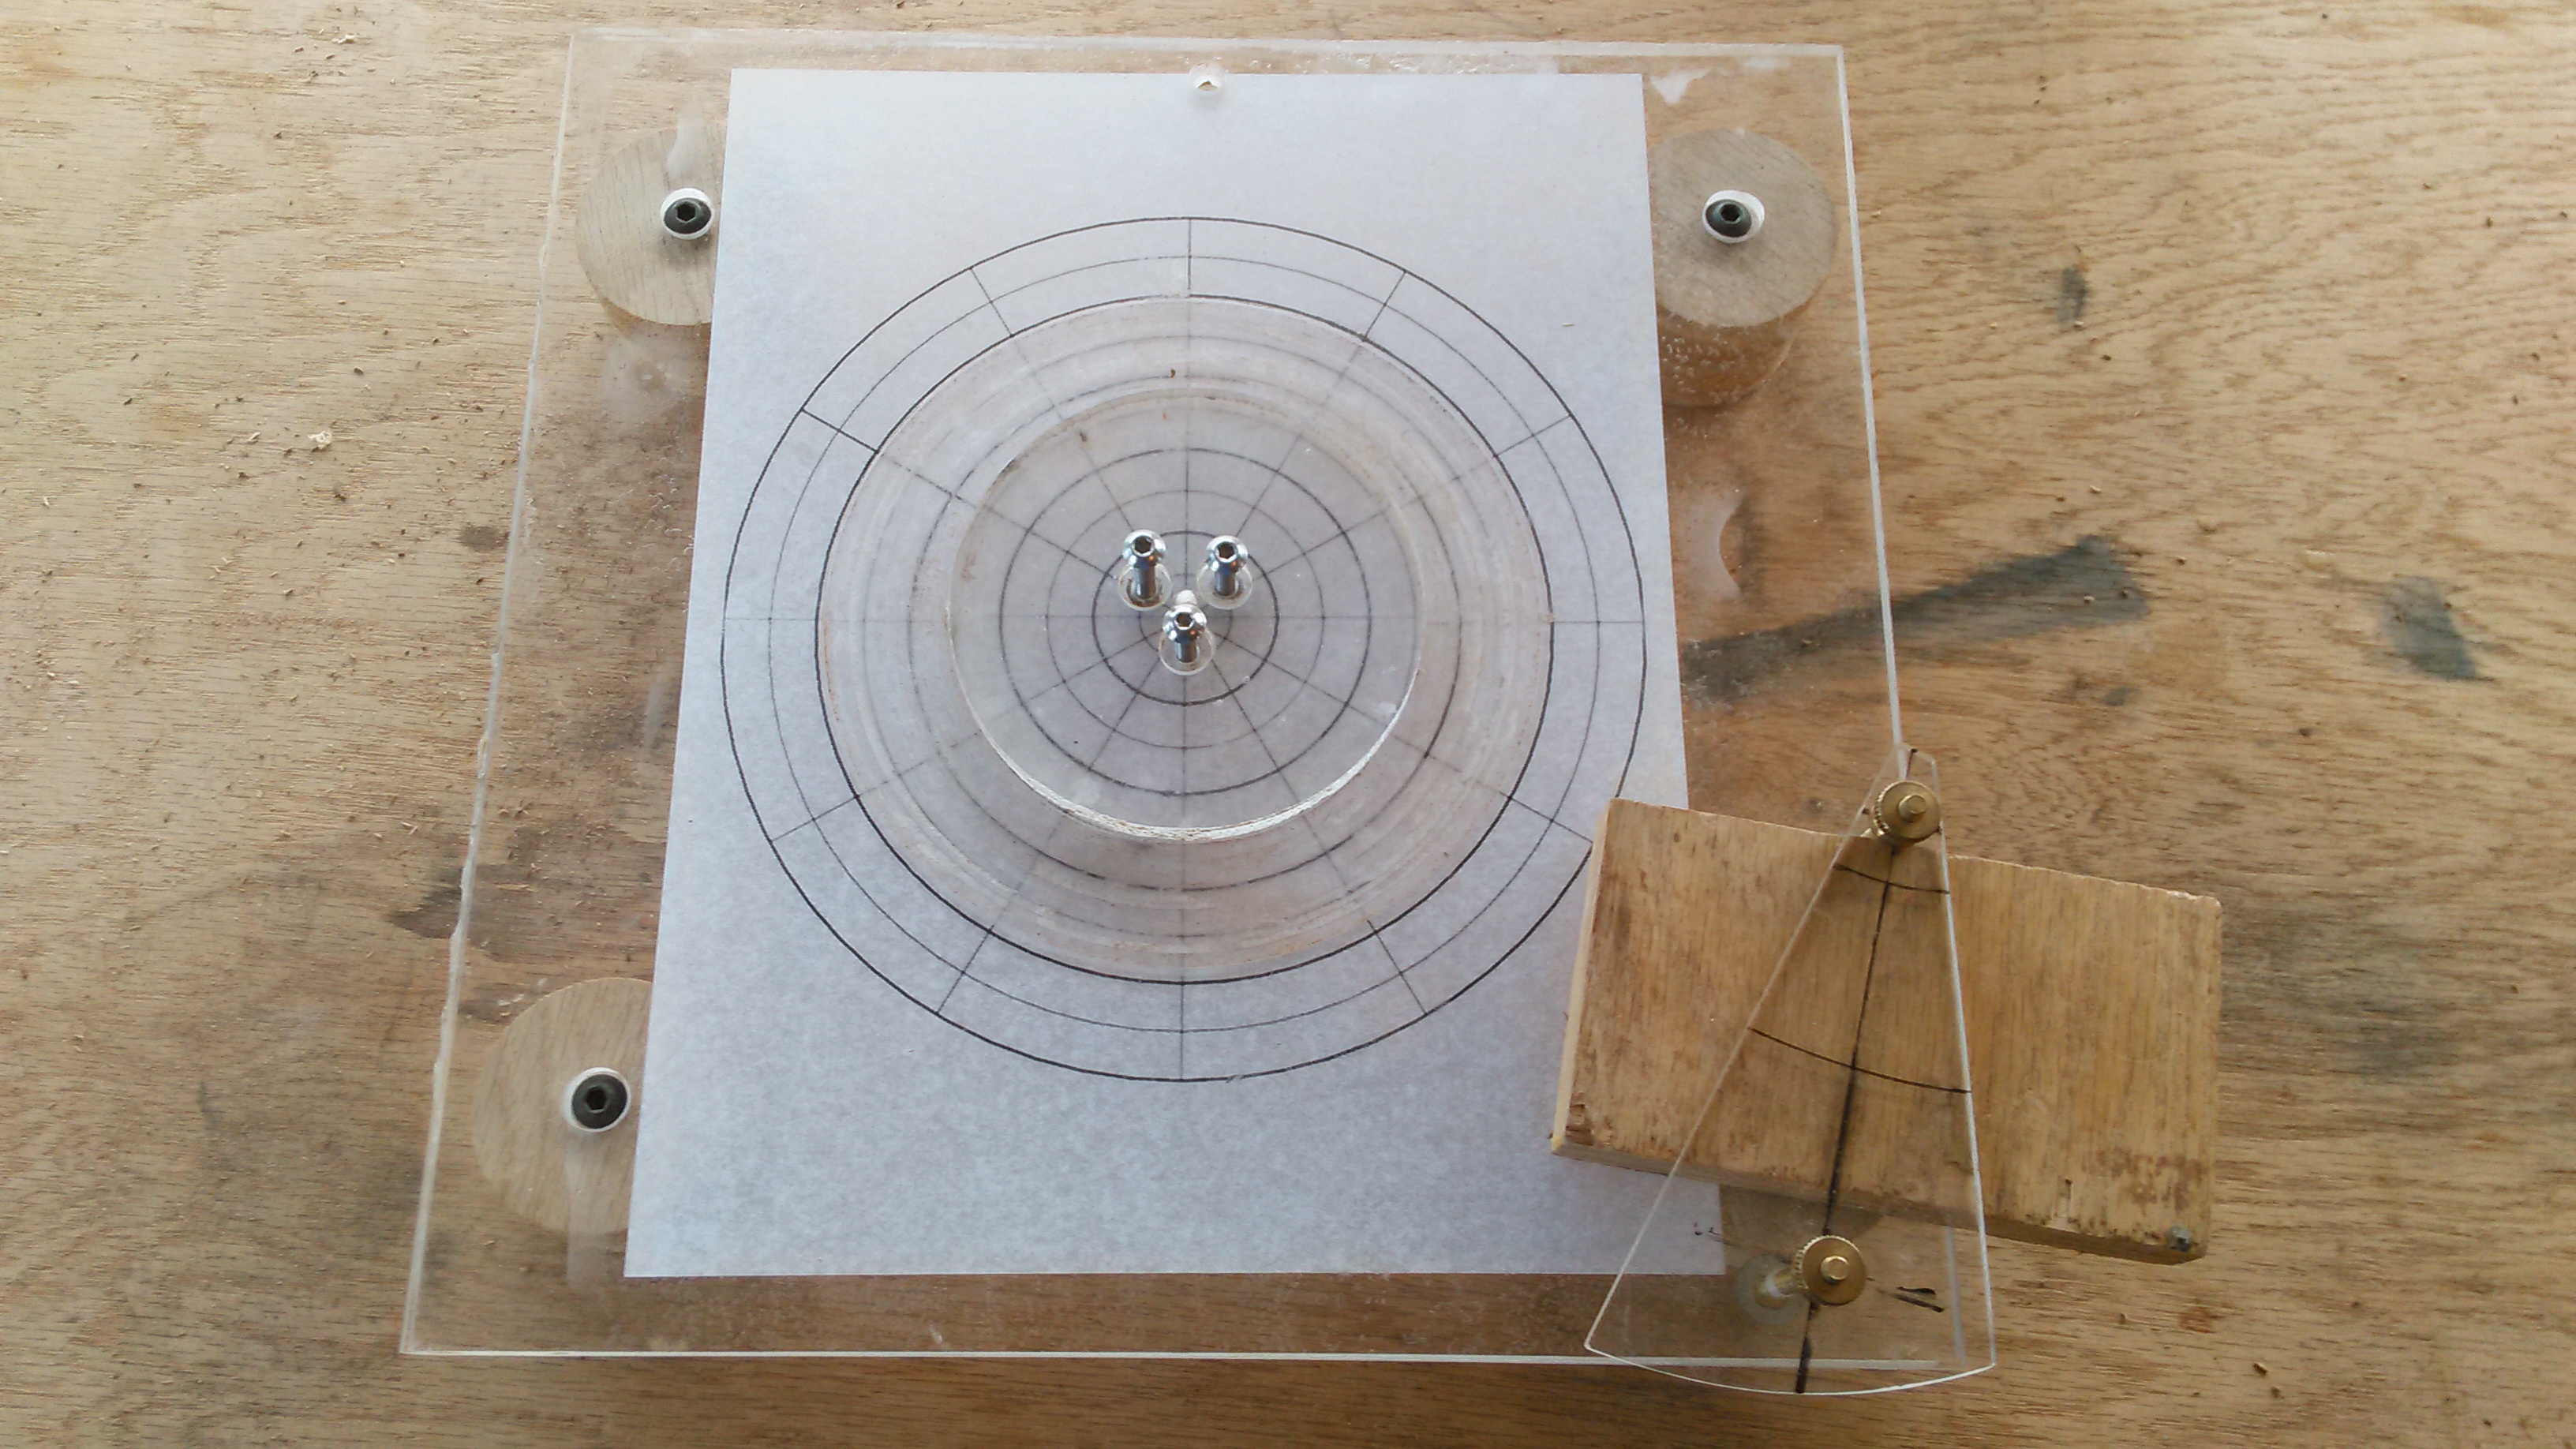
2. Position a scrap block (~4-1/4″ X 3-1/4″) underneath the wedge template.
![IMG_20150903_224458[1]](http://www.ericschaeferguitars.com/wp-content/uploads/2015/09/IMG_20150903_2244581.jpg)
3. Position your first strip between the wedge template and the scrapblock and orient the grain lines with the center line on the wedge template. Tighten down the thumbscrews.
![IMG_20150903_230009[1]](http://www.ericschaeferguitars.com/wp-content/uploads/2015/09/IMG_20150903_2300091.jpg)
4. cut off the excess on both sides of the template with a small backsaw, using the template as a bearing guide for the saw.
![IMG_20150903_230247[1]](http://www.ericschaeferguitars.com/wp-content/uploads/2015/09/IMG_20150903_2302471.jpg)
5. Loosen the screws and set aside the tapered piece you’ve created. Throw away the small offcut. The larger offcut you can flip over and re-insert beneath the template so that the angled edge lines up with the template edge. The grain lines should already be relatively in-line with the center line of the template.
![IMG_20150811_154031[1]](http://www.ericschaeferguitars.com/wp-content/uploads/2015/09/IMG_20150811_1540311.jpg)
6. Cut again. Set aside tapered piece.
![IMG_20150811_154244[1]](http://www.ericschaeferguitars.com/wp-content/uploads/2015/09/IMG_20150811_1542441-e1441336621340.jpg)
7. Continue cutting, flipping, and setting aside your tapered pieces until the offcut is too small to use.
![IMG_20150811_154509[1]](http://www.ericschaeferguitars.com/wp-content/uploads/2015/09/IMG_20150811_1545091.jpg)
8. Repeat steps 3-7 with the other scrapwood strips until you have 12 tapered pieces.
![IMG_20150903_232657[1]](http://www.ericschaeferguitars.com/wp-content/uploads/2015/09/IMG_20150903_2326571.jpg)
9. Apply paste wax to the bottom surface of the clamp. This is to prevent you from gluing your rosette to the jig.
![IMG_20150812_141113[1]](http://www.ericschaeferguitars.com/wp-content/uploads/2015/09/IMG_20150812_1411131.jpg)
10. Cover the platform surface in wax paper. Also, to prevent you from gluing your rosette to the jig. Place the clamp back in its home by puncturing the 3 socket cap screws through the wax paper and tightening them down. Don’t tighten all the way just yet.
![IMG_20150812_141550[1]](http://www.ericschaeferguitars.com/wp-content/uploads/2015/09/IMG_20150812_1415501.jpg)
11. For each tapered piece, clean up both edges on a shooting board with a block plane. Just a pass or two should be sufficient.
Tip: You can clamp your scrap block to the edge of your workbench with a cam clamp as shown below for a makeshift miniature “shooting board.”
![IMG_20150812_145052[1]](http://www.ericschaeferguitars.com/wp-content/uploads/2015/09/IMG_20150812_1450521-e1441337949342.jpg)
12. Place your first tapered piece beneath the clamp and position it so that the edges line up with the radial lines on the jig.
![IMG_20150812_142341[1]](http://www.ericschaeferguitars.com/wp-content/uploads/2015/09/IMG_20150812_1423411.jpg)
13. Place another tapered piece opposite to the first one just to prop the clamp up on the other side. Tighten the 3 socket cap screws just enough to hold the 2 tapered pieces in place.
![IMG_20150812_142334[1]](http://www.ericschaeferguitars.com/wp-content/uploads/2015/09/IMG_20150812_1423341.jpg)
14. Select your next tapered piece and place it under the clamp adjacent to the first piece. Loosen the clamp as necessary to slide the piece beneath.
Position it so that the edges line up with the radial lines. If the taper seems off then adjust the fit of that piece on the “shooting board.”
![IMG_20150812_142955[1]](http://www.ericschaeferguitars.com/wp-content/uploads/2015/09/IMG_20150812_1429551-e1441339629954.jpg)
15. Once the taper matches, replace the piece and tighten down the clamp just a hair.
Run a bead of water-thin CA glue (superglue) along the joint. Only the water-thin stuff is thin enough to wick down into the joint. Spray with accelerator to instantly cure the glue.
![IMG_20150812_142810[1]](http://www.ericschaeferguitars.com/wp-content/uploads/2015/09/IMG_20150812_1428101.jpg)
16. Repeat steps 14 and 15 until all 12 pieces are installed as shown below.
Note: You may be tempted to skip the 12th piece because you know that the fretboard tongue will cover that part of the rosette anyway. I would advice against this. You will get a cleaner cut when you rout out the rosette if the rosette has the rigidity of a closed loop.
![IMG_20150812_145832[1]](http://www.ericschaeferguitars.com/wp-content/uploads/2015/09/IMG_20150812_1458321.jpg)
17. Setup a dremel tool in a circle cutting jig and pin the circle cutting jig on the clamp. I am using a 3/32″ spiral downcut bit in this case.
![IMG_20150812_152052[1]](http://www.ericschaeferguitars.com/wp-content/uploads/2015/09/IMG_20150812_1520521.jpg)
18. Set your circle cutter’s radius to make the outside cut first. This is crucial! If you make the inside cut first then the clamp will no longer be holding your rosette in place, making the outside cut difficult or impossible.
Adjust the bits depth to make an initial “just grazing” pass.
Tip: Every pass should begin and end in the same place because, as previously mentioned, the fretboard will cover part of the rosette, and you are far more likely to damage your rosette when you are starting or stopping the bit.
![IMG_20150812_153227[1]](http://www.ericschaeferguitars.com/wp-content/uploads/2015/09/IMG_20150812_1532271.jpg)
19. Adjust the bits depth by 1/32″ or less for another pass.
![IMG_20150812_153738[1]](http://www.ericschaeferguitars.com/wp-content/uploads/2015/09/IMG_20150812_1537381.jpg)
20. Repeat step 19 until you’re through the workpiece.
![IMG_20150812_154605[1]](http://www.ericschaeferguitars.com/wp-content/uploads/2015/09/IMG_20150812_1546051.jpg)
21. Make the inside cuts.
![IMG_20150904_004649[1]](http://www.ericschaeferguitars.com/wp-content/uploads/2015/09/IMG_20150904_0046491.jpg)
The rosette is complete! See the next post for tips on installing the rosette into the soundboard.
![IMG_20150812_161032[1]](http://www.ericschaeferguitars.com/wp-content/uploads/2015/09/IMG_20150812_1610321.jpg)
See Radial Rosettes: Building the Radial Rosette Maker for information on building the jig used in this post.
Also see Installing the Rosette
Was this useful? I would love to hear your questions or comments! I try to answer every e-mail I receive, so please be patient with me 🙂 eric@ericschaeferguitars.com
Want to learn more? Take a class with Eric Schaefer and build your own guitar in 8 days


